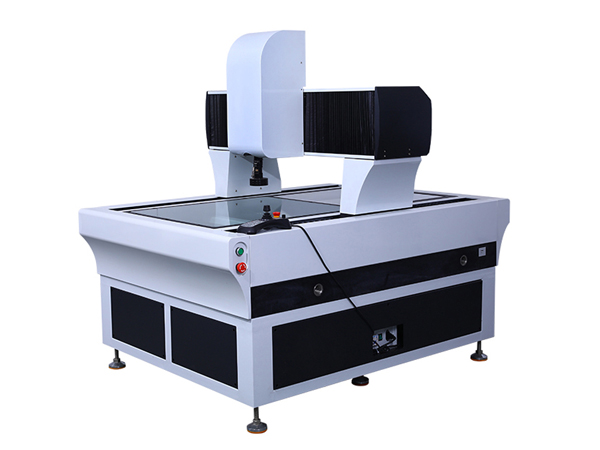
Introduction
As precision manufacturing enters the “sub-micron era”, conventional gauges and dedicated fixtures can no longer satisfy the rapid, full-scale inspection of complex sculptured
surfaces, 3-D hole patterns and free-form features. Thanks to their open architecture, high load capacity and excellent accuracy-to-cost ratio, moving-bridge coordinate measuring machines (CMMs) have become the core metrology platform for geometrical quality control in aerospace, automotive, precision mould and 3C electronics industries. In recent years, Chinese high-end models have achieved serial production at the 0.9 µm accuracy level, breaking the monopoly of imported instruments and providing a crucial metrology guarantee for the localisation of high-end equipment . Structural Principle and Measuring Chain
Coordinate system
The machine uses a granite table as the reference plane to establish a Cartesian right-hand frame:
X axis: bridge moves forward/backward along table guideways
Y axis: carriage travels left/right on the crossbeam
Z axis: spindle moves up/down along the carriage
The three mutually perpendicular axes are driven independently; real-time feedback from linear encoders gives the spatial coordinates of any probed point .
Measuring chain
Probe → probe head → spindle → air-bearing guideways → linear scales → motion controller → metrology software → temperature/vibration compensation module.
Probe accuracy governs repeatability; guideway and drive structure determine volumetric accuracy; software algorithms dictate data-processing capability. Together they form a “high-accuracy closed loop”.
Key Technologies for Ultra-High Accuracy
High-stiffness lightweight bridge
Cross-beam material: 99 % alumina ceramic, E = 300–400 GPa, ≈4× that of granite, suppresses angular error to < 0.5″
Topology optimisation: FEA-based iterative weight reduction of 15 %, first eigen-frequency increased by 20 %, balancing acceleration performance and bending resistance
Four-sided wrap-around air bearings Compared with two- or one-sided arrangements, the four-sided wrap divides air-film pre-load into independent pockets. Four pads per axis provide full 6-DOF constraint; with 1 000 kg payload static angular error < 0.3″, dynamic following error < 1 µm .
Metal-friction drive
Long axes adopt a steel-on-bronze friction pair without tooth engagement, eliminating belt elasticity and rack pitch errors. Start–stop impact drops by 40 %; scanning speed reaches 30 mm s⁻¹ while maintaining 1 µm path accuracy .
Thermal and dynamic-error compensation
0.01 °C-resolution Pt sensors on all axes provide real-time thermal expansion correction; Dynamic error map measured by laser interferometer is written into the NC; at high-speed corners bridge inertial bending is suppressed from 5 µm to < 1 µm .
Localised probe and software
Chinese trigger probe CP100T five-way repeatability ≤ 0.3 µm; articulating head ACH100T 720-position indexing repeatability 1.5″; Power DMIS software is PTB-certified, supports DMIS 5.3 and I++ protocols, enabling seamless integration with PLM systems such as Siemens Teamcenter .
Typical Specifications (800 mm × 600 mm × 400 mm range)
Maximum permissible volumetric error MPEE ≤ 0.9 µm + 3L/1 000
Maximum permissible scanning error MPEP ≤ 1.2 µm
Acceleration 3 000 mm s⁻², traverse speed 600 mm s⁻¹
Table payload 1 200 kg, machine mass 2 100 kg
Ambient 18–22 °C, gradient ≤ 0.5 °C h⁻¹, humidity 45 %–75 %
Application Fields
Aerospace: rapid sampling of integrally bladed disks and turbine-blade leading-edge profile within 10 µm;
Automotive: simultaneous evaluation of 400 hole-pattern position tolerances on engine blocks in < 5 min;
Precision moulds: instant colour-deviation map between mobile-phone shell free-form and CAD;
Precision hardware: on-line 1 µm-level radial run-out inspection of watch-gear shafts .
Future Trends
Multi-sensor fusion: trigger + laser + white-light confocal, enabling “one setup—all features” measurement;
Digital twin: real-time temperature, load and error models build a CMM digital twin to predict accuracy drift and trigger proactive maintenance;
Shop-floor integration: high IP rating, vibration-isolated base and robot loading/unloading bring 1 µm metrology from the lab to the line;
Intelligent compensation: deep-learning training on massive dynamic-error data sets enables adaptive compensation of non-rigid errors, targeting MPEE ≤ 0.5 µm .
Conclusion
High-accuracy moving-bridge CMMs have evolved from “imported high-end equipment” to “domestic core metrology instruments”. Through the combined breakthroughs of ceramic cross-beams, metal-friction drives, four-sided wrap-around air bearings, dynamic-error modelling and localised probe/control systems, Chinese models now achieve stable serial production at the 0.9 µm accuracy level and are competitive with imported high-end machines. Continuous R&D on multi-sensor fusion, digital twins and on-line shop-floor measurement will further expand their application scope, providing a solid metrological foundation for the accuracy upgrade and quality advancement of China’s high-end manufacturing.


